


Most pool owners only think about resurfacing when the damage is already obvious: walls scratching skin, stains that resist every chemical, and hairline cracks spreading toward the floor drain. By that point, the surface has been failing for longer than they realise.
Pool resurfacing is the largest routine maintenance investment a pool owner makes, and it is one of the least understood. Conflicting advice online makes it worse: some sources quote a simple weekend project, others warn of structural failure risks. Neither camp explains what a professional resurface actually involves or why most DIY attempts end in a second bill.
This guide covers the full scope of what pool resurfacing includes, how each surface type performs across its lifespan, the warning signs you cannot afford to ignore, and an honest, unfiltered verdict on whether a homeowner can handle it themselves.
What Is Pool Resurfacing?
Pool resurfacing is the process of applying a new interior coating to the concrete, gunite, or shotcrete shell of a swimming pool. The original surface degrades over time through UV exposure, chemical cycling, water pressure fluctuation, and physical wear. Resurfacing replaces that failed layer with a fresh, bonded finish.
The terminology used across the industry overlaps. “Replastering” refers specifically to cement-based applications, while “resurfacing” covers all interior finish types, including plaster, quartz aggregate, pebble, fibreglass coating, and tile. Regulatory bodies and permitting offices do not distinguish between the two terms for compliance purposes.
Resurfacing applies to in-ground concrete and gunite pools. Fibreglass shell pools require gel coat restoration. Vinyl-lined pools need liner replacement, not resurfacing. These are different processes with different trades, materials, and cost structures.
What Is Included in Pool Resurfacing?
A professional pool resurface is not a single-day paint job. It is a staged, multi-day process where each phase directly affects the success of the next.
1. Pool Draining
The pool must be fully drained before any surface work begins. In clay or waterlogged soil conditions, draining too quickly creates hydrostatic pressure that can crack or “pop” the shell out of the ground. A competent contractor assesses soil conditions and drains at a controlled rate, inspecting the shell as the water level drops.
Refilling after completion adds further cost and time. Budget for both when getting quotes, as some contractors list draining and refilling as separate line items.
2. Surface Preparation (Chip-Out and Acid Etching)
This is the most labour-intensive phase and the most commonly skimped. Crews use industrial chipping hammers, angle grinders, and acid-etching solutions to remove the old surface layer down to a clean, mechanically profiled substrate.
The new material bonds to the prepared shell surface. Without an adequate surface profile, the new finish delaminates within 1-3 years regardless of material quality. Preparation quality separates a 10-year resurface from a 3-year failure.
This stage also exposes what’s underneath. Hidden cracks, hollow spots, and delaminated areas become visible and must be addressed before the new surface goes on.
3. Structural Crack Repair
Any structural cracks found during chip-out get filled with compatible hydraulic cement or structural epoxy and allowed to cure fully before resurfacing proceeds. Resurfacing over an unrepaired crack transmits the crack directly through to the new surface.
Active cracks (cracks that move with ground movement) require engineering assessment before any resurfacing work begins. A reputable contractor identifies these and will not resurface over them without proper remediation.
4. Waterline Tile Work
The tile band at the waterline faces concentrated chemical exposure, calcium scaling, and UV damage. Many homeowners choose to regrout or replace waterline tiles at the same time, since the pool is already empty and the surrounding surface is being disturbed.
This is optional, but cost-efficient to complete during the same mobilisation. Doing it separately later means draining the pool again and paying another call-out fee.
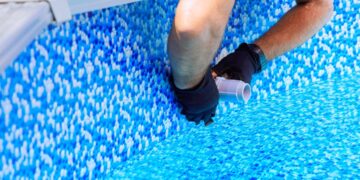
5. New Surface Application
The chosen material (plaster, quartz aggregate, pebble, fibreglass coating, or tile) is applied to the prepared shell. Application timing, temperature, and technique are critical variables that determine the quality of the finished surface.
Plaster, for example, must be applied in coordinated sections by a full crew working simultaneously. It has a working window of minutes before it begins to set. Any delay between sections creates a “cold joint,” which is a permanent visible line and a structural weakness in the finish.

6. Start-Up Chemical Treatment
After the pool refills, the surface requires a precise chemical management protocol for 7-28 days, depending on the finish type. This is called the start-up process, and it determines whether the new surface cures correctly or discolours, roughens, and mottles within the first season.
Start-up involves daily water testing, controlled brushing schedules, and staged chemical additions. Imbalanced pool water alkalinity is one of the fastest ways to shorten the lifespan of any new surface finish, which is why the start-up period requires daily testing and adjustment. A rushed or incorrect start-up is one of the leading causes of early resurfacing failure, and it is not covered under workmanship warranties if the homeowner manages it incorrectly.
7. Equipment Inspection and Commissioning
Before the pool refills, a professional contractor inspects the pump, filter, jets, and plumbing returns. Equipment faults cause persistent water chemistry imbalances that destroy new surfaces faster than any other single factor.
If equipment problems go undetected and the pool refills with a new surface, chemical damage begins immediately. Identifying faults before refilling prevents this.

Pool Surface Types Compared
Plaster, if applied properly, lasts around 10 years and costs approximately $4 per square foot (USD), while pebble finishes have a lifespan of 20 or more years at around $10 per square foot. Pool paint costs roughly $1 per square foot but carries a lifespan of only two to five years.
The table below maps each surface type against the factors that matter most for Australian residential pools.
| Surface Type | Core Material | Expected Lifespan | Relative Cost | Texture | Best Suited For |
| Marcite (White Plaster) | White cement + marble dust | 7-12 years | $ | Smooth | Budget-conscious owners |
| Coloured Plaster | Pigmented cement blend | 7-12 years | $$ | Smooth | Better aesthetics, same budget tier |
| Quartz Aggregate | Cement + crushed quartz | 12-17 years | $$$ | Lightly textured | Best mid-range value |
| Pebble / Pebblecrete | Cement + natural pebbles | 15-25 years | $$$$ | Textured | Premium residential pools |
| Fiberglass Coating | Fibreglass topcoat over shell | 15-25 years | $$$$ | Smooth | Pools converting from aged plaster |
| Glass Bead | Glass beads in plaster matrix | 12-18 years | Smooth/reflective | Luxury aesthetic focus | |
| Full Tile (Porcelain/Glass) | Porcelain or glass mosaic | 20-30+ years | Hard | Maximum durability and design range |
Reading this table correctly: the cheapest option per square metre is rarely the cheapest option over a decade. A pool replastered three times in 18 years (plaster at 7-year cycles) costs more in labour, downtime, and materials than a single quartz resurface done once.
Signs Your Pool Needs Resurfacing
Rough Texture on Walls and Floor
If the surface feels abrasive on bare feet or skin, the finish has worn past functional limits. The roughness also creates a physical foothold for algae spores, making the pool harder to keep clean regardless of chemical treatment.
Stains That Return Within Weeks of Cleaning
Surface staining that reappears quickly after acid washing indicates the staining agent has penetrated beyond the surface layer into the material itself. Repeated acid washing buys time but removes material thickness each cycle, accelerating the need for full resurfacing.
Visible Cracks
Hairline surface cracks are cosmetic at early stages. Any crack wider than 2mm, any crack that propagates over time, or any crack accompanied by measurable water loss requires professional inspection immediately.
Persistent Algae Despite Balanced Chemistry
Algae embed into degraded, porous surfaces and resist standard chemical treatment. If your pool consistently fights algae blooms with balanced water chemistry, the surface is harbouring the problem and cleaning alone will not resolve it.
Unexplained Water Loss
Losing more than 3-4mm of water per day in Australian conditions, after accounting for evaporation, often signals microscopic surface cracking that allows seepage. A bucket test (a filled bucket left on the pool step for 24 hours, comparing the water level drop inside and outside the bucket) confirms whether you have a leak or evaporation.
Delamination and Flaking
Chunks of finish material separating from the shell signal complete bonding failure. At this stage, resurfacing is not optional; it is urgent.
Can I Resurface My Pool Myself?
Technically, yes. Practically, no, for the overwhelming majority of homeowners.
Pool resurfacing is not comparable to painting a deck or re-sealing pavers. It requires industrial chipping equipment, grinding tools, plaster mixing rigs, application crews working in coordinated stages, and precise water chemistry management across a weeks-long cure period.
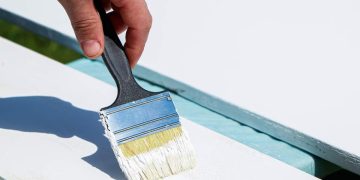
What about pool paint?
Epoxy and chlorinated rubber pool paints are sold at pool supply retailers and marketed toward DIY. These products are temporary surface coatings, not structural resurfacing materials. Pool paint lasts 2-5 years under Australian UV and chemical exposure before it peels. When it does, every flake must be fully removed before any permanent surface can be applied. You are not resurfacing the pool; you are starting a peeling cycle that will cost more to undo than the original professional resurface would have.
What about white plaster?
White plaster is the surface type most often cited in DIY discussions. Plaster application requires a crew of 4-6 people working simultaneously across the pool to maintain wet-edge consistency. A solo homeowner cannot plaster a 50sqm pool correctly. The result will be visible cold joints, lap marks, and colour variation that are permanent and cannot be fixed without stripping the surface.
Why DIY Pool Resurfacing Almost Always Fails
Inadequate Surface Preparation
Professional crews use industrial-grade equipment to achieve the surface profile the new material needs to bond. A homeowner using a rented angle grinder rarely achieves adequate preparation, particularly in the bond beam and step areas. The consequence is delamination within 1-3 years, beginning at the weakest prepared areas.
Application Timing Cannot Be Managed Alone
Plaster sets in minutes. Professional application requires multiple people working in organised sections, maintaining a live wet edge across the entire pool. Any gap in coverage creates a cold joint. A homeowner working alone cannot maintain that pace, and the resulting surface will show it permanently.
Start-Up Failure Destroys New Surfaces
The 7-28 day post-fill start-up period requires daily water testing and precise, staged chemical additions. Getting this wrong causes mottling, discolouration, and surface roughness that no amount of chemical correction will fix. This failure mode is so common in DIY projects that it is effectively the default outcome.
No Warranty or Recourse
Licensed pool resurfacers in Australia typically provide workmanship warranties of 3-7 years. A DIY failure provides no warranty, no recourse, and leaves the homeowner facing professional remediation costs on top of the original DIY material spend.

When to Call a Licensed Professional
Contact a licensed pool resurfacing contractor if any of the following apply:
- The plaster surface is older than 10 years
- The quartz or pebble surface is older than 15 years
- Cracks are wider than 2mm or are actively growing
- The bucket test confirms water loss beyond evaporation
- Chunks of surface material are separating from the shell
- The pool has never been resurfaced since original construction
- You want a pebble, quartz, or fiberglass finish (none are viable DIY options)
When selecting a contractor, verify their licence through your state building authority. In most Australian states, pool renovation work above certain cost thresholds requires a licensed builder or pool contractor. For homeowners, West Coast Pool Resurfacing in Perth is a reputable local option worth getting a quote from. Ask specifically for references on completed resurfacing projects, confirm the start-up process is included in the quote, and get the warranty terms in writing before signing.
Conclusion
Pool resurfacing covers a full sequence of work: draining, surface preparation, structural repairs, new finish application, and a critical chemical start-up period; every stage affects the one that follows it. The surface material you select determines how long the finish lasts and what it costs across its full lifespan, with quartz and pebble finishes delivering the strongest long-term value for Australian conditions. DIY resurfacing is not a realistic option for most homeowners; the equipment requirements, timing constraints, and start-up complexity make professional installation the only path to a finish that lasts.


